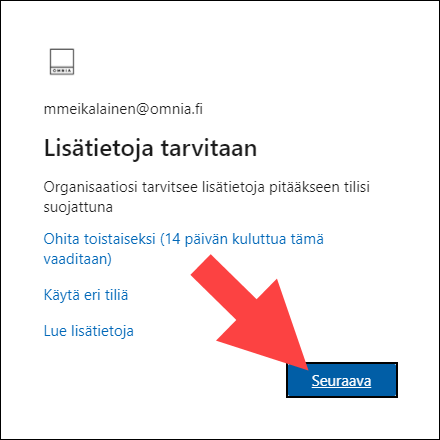
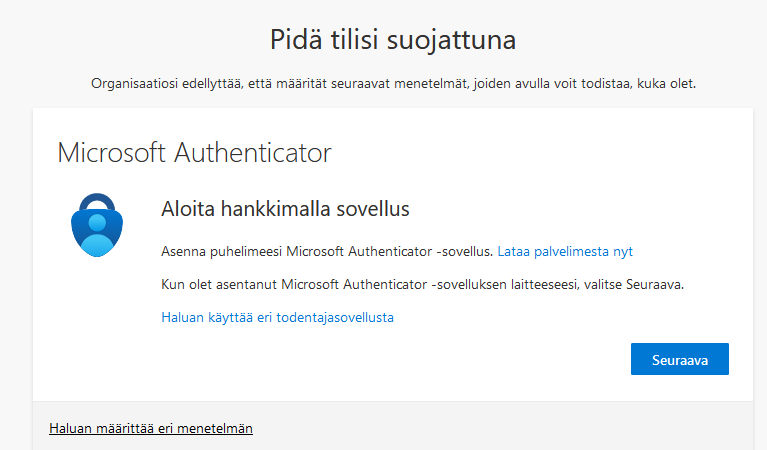
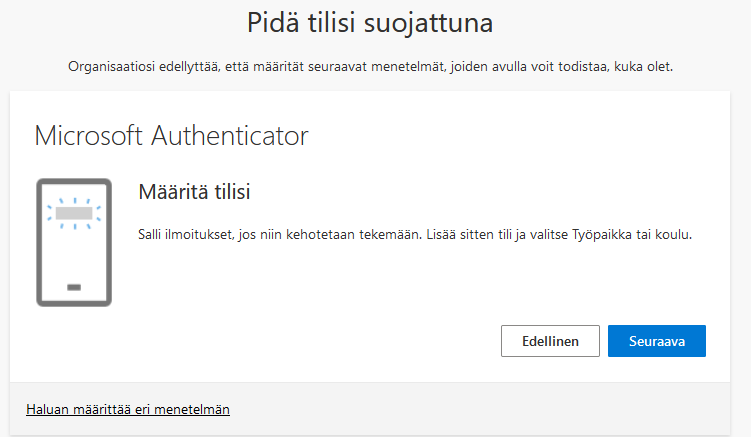
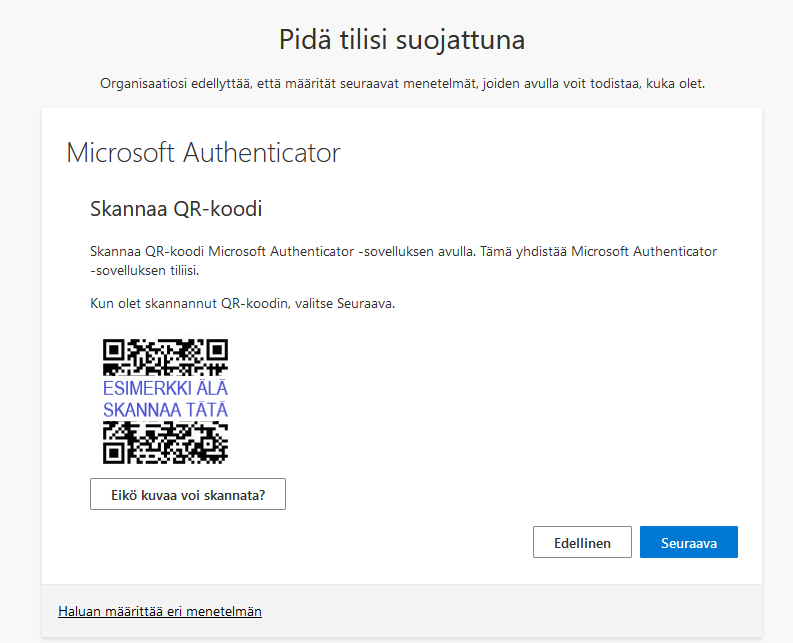
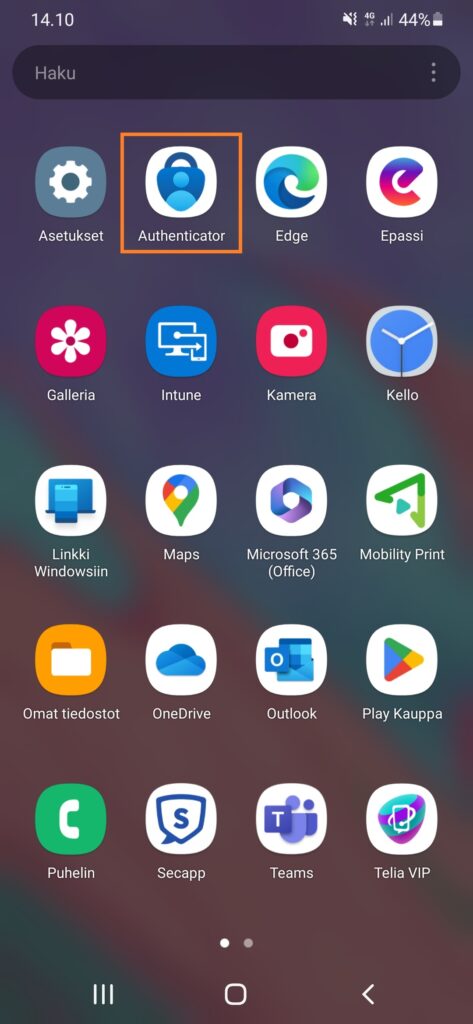
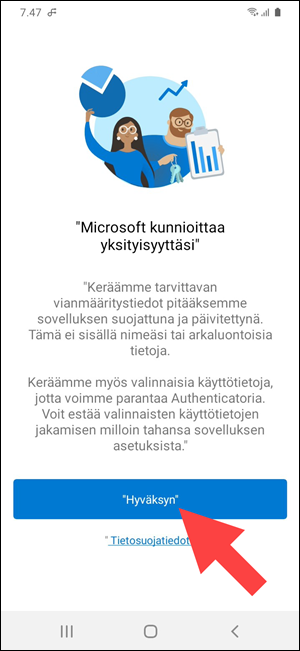
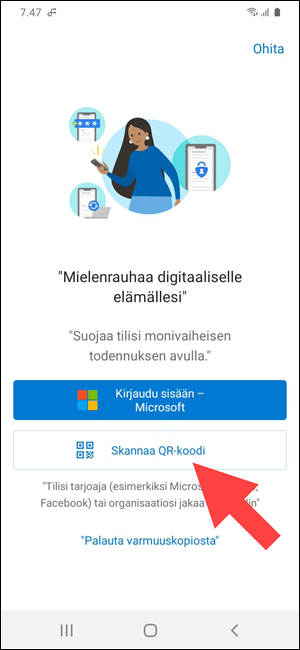
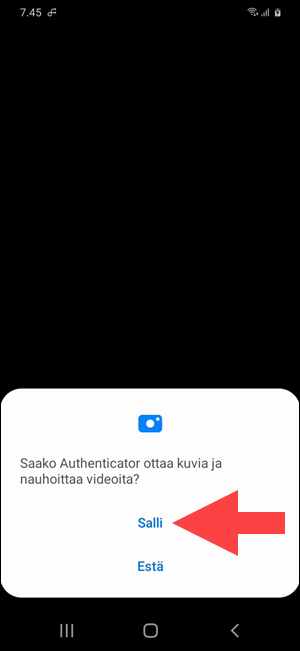
Enabling multi-factor authentication on your Android device
The application to be used is Microsoft Authenticator. Other authenticator apps will not do. Download the Microsoft Authenticator app from the Google Play Store on your Android device.
Note! If you change the phone or phone number that you have authentication associated with, make sure you don’t lock yourself out of your account before doing so. First, enable multi-factor authentication on your new device or phone number. Then, disable the old number or device.
- If you are changing your phone or phone number follow the instructions: Add multi-factor authentication to a new device.
If an accident occurs, you can visit Omnia’s IT helpdesk with a photo ID, and multi-factor authentication can be reset and connected to a new number or phone.
1. Open intra.omnia.fi (staff) or pilvi.omnia.fi (students and staff) in your computer’s browser. Log in with your Omnia username and password.
A staff username, for example in the case of Matti Meikäläinen, is in the format mmeikala.
- Email address – first.last@omnia.fi | for example, matti.meikalainen@omnia.fi
- Alias email address – username@omnia.fi | for example, mmeikala@omnia.fi
A student’s username is their student number, for example, 80001234.
- Email address – first.last@edu.omnia.fi | for example, matti.lukiolainen@edu.omnia.fi
- Alias email address – username@omnia.fi | for example, 80001234@omnia.fi
2. After entering your password, you will see the Lisätietoja tarvitaan window. Click the Seuraava button. In English, these translate to ‘Additional information required’ and ‘Next‘ button.
Note! If, after entering your password, you do not see the ‘Lisätietoja tarvitaan’ window and instead log in directly to intra.omnia.fi or pilvi.omani.fi, follow these instructions: Add multi-factor authentication to a new device, starting from step 1.
3. Click Next.
If you want multi-factor authentication to work via SMS text message instead of the Microsoft Authenticator app, click I want to configure a different method.
Microsoft has limited the number of text messages to 10 per day. Omnia has no influence on this.
4. Click Next.
5. Open the Microsoft Authenticator app. If asked, accept the terms and conditions. If you don’t have the Microsoft Authenticator app on your phone, install it from the Play Store.
6. Accept the terms and conditions, and then select Scan QR Code.
7. Allow the app to take pictures and record videos.
8. Scan the QR code and tap OK to acknowledge the app lock notification.
9. After scanning the QR code on your computer screen, click Next.
10. Enter the number displayed on the computer screen in the phone’s Authenticator app and click Yes. After this, the Authenticator app will still ask for your phone’s own unlock code.
If you didn’t just log in or use one of Omnia’s cloud services with your Omnia account, or especially if the login seems to be from abroad, but you are in Finland, click No, it’s not me to decline the authentication.
It is very important that you contact the IT helpdesk as soon as possible and tell them about the incident. Rejecting identification using the No, I’m not me button will result in the token being locked, as it may be a hijacking of the token. The investigation must begin as soon as possible. The IT helpdesk will investigate the situation and tell you about further measures.
11. Click Next.
12. You have successfully set up multi-factor authentication. Click Valmis.